UPDATE : You can take the firmware file from VMware Fusion instead of building your own. its located :
/Applications/VMware\ Fusion.app/Contents/Library/roms/EFI64.ROM
Use this process of adding it to the VM. It has the advantage of supporting the Recovery HD. Here is a copy of the Fusion 11.5.2 Rom efi64_apfs.rom
Also remember to have you VM set to at least :
- Virtual Machine Version: 9 (ESXi 5.1 and later)
- This is the minimum version required for 10.13 and later.
- Guest Operating System: Other > Apple Mac OS X 10.8 (64-bit)
- CPUs: 2 cores
This also allows older versions of ESXI, eg 6.0, to run newer Mac OS Clients.
Newer versions of the Darwin VMware tools can be got from VMWare Fusion, located in /Applications/VMware\ Fusion.app/Contents/Library/isoimages/darwin.iso
More info can be found here or as a pdf macOS 10.15 Catalina on VMware ESXi 6.0 | Mac Insights
Apple has just released the macOS High Sierra with new features, one of them is the brand-new Apple File System (APFS) that is optimized for flash storage which newer Macs enjoy. If you happen to be using macOS in a virtualized way, e.g. with VMware, you may have trouble getting the new OS to work as the upgrade forces conversion of the boot partition to APFS which the VMware UEFI does not support.
To solve the problem, we need to let the VMware UEFI know APFS and luckily the APFS driver can be extracted from the High Sierra installer as a UEFI driver executable. We can then slip the driver to the UEFI BIOS that bundles with VMware Player itself and everything should work.
Getting Started
We’ll need 3 things before modifying the VMware UEFI BIOS. They are listed below:
- The APFS UEFI Driver extract
- UEFITool, a tool for editing UEFI BIOS
- FFS to convert the APFS driver to UEFI module
The APFS UEFI Driver can be located in /usr/standalone/i386/ on a Real Mac running 10.13 or higher
To simplify things, you can download my modified efi64_apfs.rom UEFI BIOS (tested on VMware Workstation Pro 14, may work for other versions too). If that ROM doesn’t work for you, go after these steps to get a modified BIOS with APFS support.
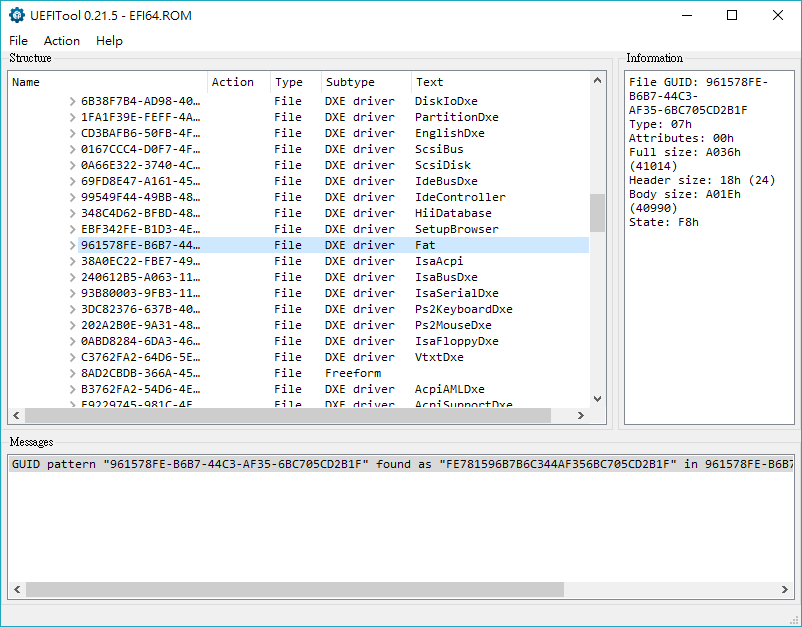
Use UEFITool to open EFI64.rom located at [VMware Installation Folder]/x64/, select File > Search and choose GUID tab. Type in 961578FE-B6B7-44C3-AF35-6BC705CD2B1F and double click the result inside Message section. Leave this screen for now.
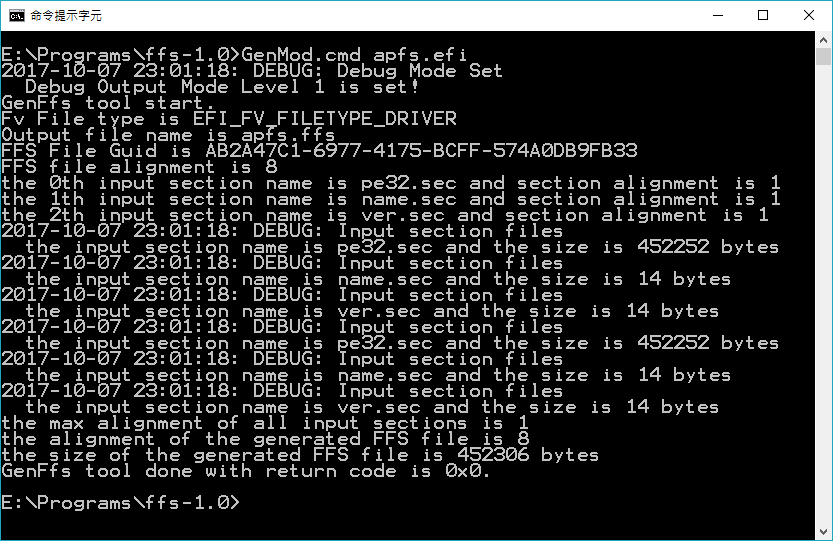
Extract the FFS tool to the same directory as the APFS driver file. Open your command prompt, change directory to that place and run this command: GenMod apfs.efi .
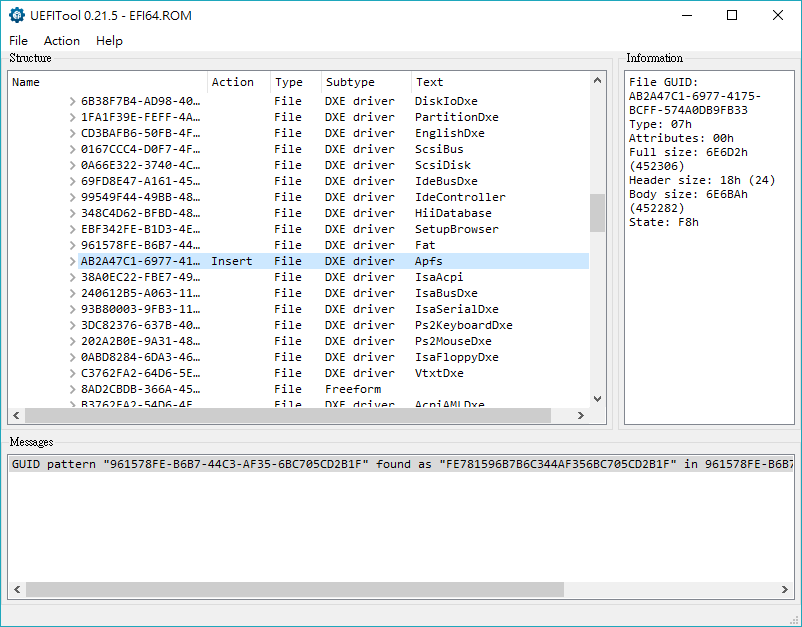
Go back to UEFITool, right-click the selected item and choose Insert After, then select apfs.ffs from the FFS directory. The screen should look like this.
Save the modified ROM with the name efi64_apfs.rom to your VM directory.
Applying the new UEFI BIOS
To get the modified UEFI BIOS to work, use a text editor to open the VMX file. Ensure the file contains the following lines.
efi64.filename = "efi64_apfs.rom"
Save the VMX file and start your VM, your macOS High Sierra will now boot as expected with an APFS volume. Voila!